Code Scanner RSS
🛠️ QUICK START GUIDE: OBDLink MX+

🛠️ QUICK START GUIDE: OBDLink MX+ Thank you for choosing Zedmotive.com.au – Your AU Diagnostic Experts STEP 1: INSTALL THE APP Scan the QR code on the product box or search "OBDLink" in the Apple App Store or Google Play Store. Download and install the free app before plugging in the device. STEP 2: CONNECT TO YOUR VEHICLE Locate your OBD-II Port: Usually found under the driver-side dashboard. Plug in the MX+: The green POWER LED should turn on. Ignition ON: Turn your key to the ON position (or press Start/Stop twice without touching the brake). Note: Many Australian diesel...
Understanding OBD2 Scan Tools: A Comprehensive Guide
User Guide: OBDLink MX+
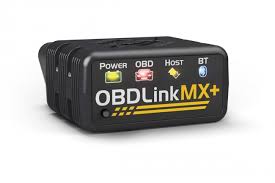
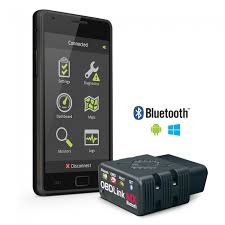
User Guide: OBDLink MX+Congratulations on your purchase of the OBDLink MX+! This user guide will walk you through the process of connecting the device to your vehicle using Bluetooth and using it with popular apps like Torque Pro and OBDLink App. Let's get started!Table of Contents:1. OBDLink MX+ Overview2. Connecting OBDLink MX+ to Your Vehicle 2.1. Bluetooth Connection3. Using OBDLink MX+ with Torque Pro4. Using OBDLink MX+ with OBDLink App1. OBDLink MX+ Overview:The OBDLink MX+ is a versatile OBD-II diagnostic tool that allows you to connect your vehicle's onboard computer (ECU) with various mobile devices. It supports Bluetooth connectivity and...
Unlocking the Power of Connectivity: Exploring the Benefits of OBDLink MX+

ScanGauge 3 Australian Version New Release!

Here At Zedmotive HQ we have just received the new ScanGauge 3 and we have wasted no time and installed it in the trusty 2011 150 seriesPrado! https://youtu.be/WczxtsVXgaYhttps://youtu.be/WczxtsVXgaY It was very easy to install with one plug into the OBD2 post under the dash 30 seconds done. The SG3 is larger than the ScanGauge 2 so we could not mount it in the same location as we had for the SG2. Luckily it comes with a window mount with a large magnet to attach the device which works well. The larger ScanGauge 3 has a bright ang colorful touch...

